- The Plot
- Posts
- How to Build an Affordable Seed Starting Setup

Forwarded this email? Join free at the-plotnewsletter.com/subscribe
Hey Reader,
Have you ever wanted to start a garden, but don’t want to break the bank on transplants from the nursery? There’s a lot of confusing information online about how to start your own seeds. That’s why I am going to break down how to build your own seed starting setup on a budget.
By building a seed starting shelf, you will be able to start your crops inside, so by the time it warms up they will have a head start. Starting seeds early will improve growth on plants like tomatoes, peppers, some herbs, cool season crops like broccoli, onion, and leeks. Meanwhile, some plants grow too fast or don’t like to be transplanted. These are plants like radishes, carrots, beets, corn, and beans and they should just be planted in the ground.
The setup is simple as you will just need a few items, which can be reused for many years to come. It’s an investment that saves you money on buying transplants every spring. Yes, this means less secret trips to the nursery and shredded receipts. As much as I would love to just give you amazon links to everything, I don’t actually think that is the most affordable way to build this. You’ll want to visit a garden center for the plant trays, and I will give you links for the lighting and shelving.
Materials:
Item | Where to Buy |
Seed trays (72-cell, generic) | Garden Center |
Reusable 1020 trays + domes | Garden center |
Soil mix (bulk) | Garden Center |
Shelving | |
Grow lights | |
Timer | |
Heat mats (if your area is cold) | Garden Center |
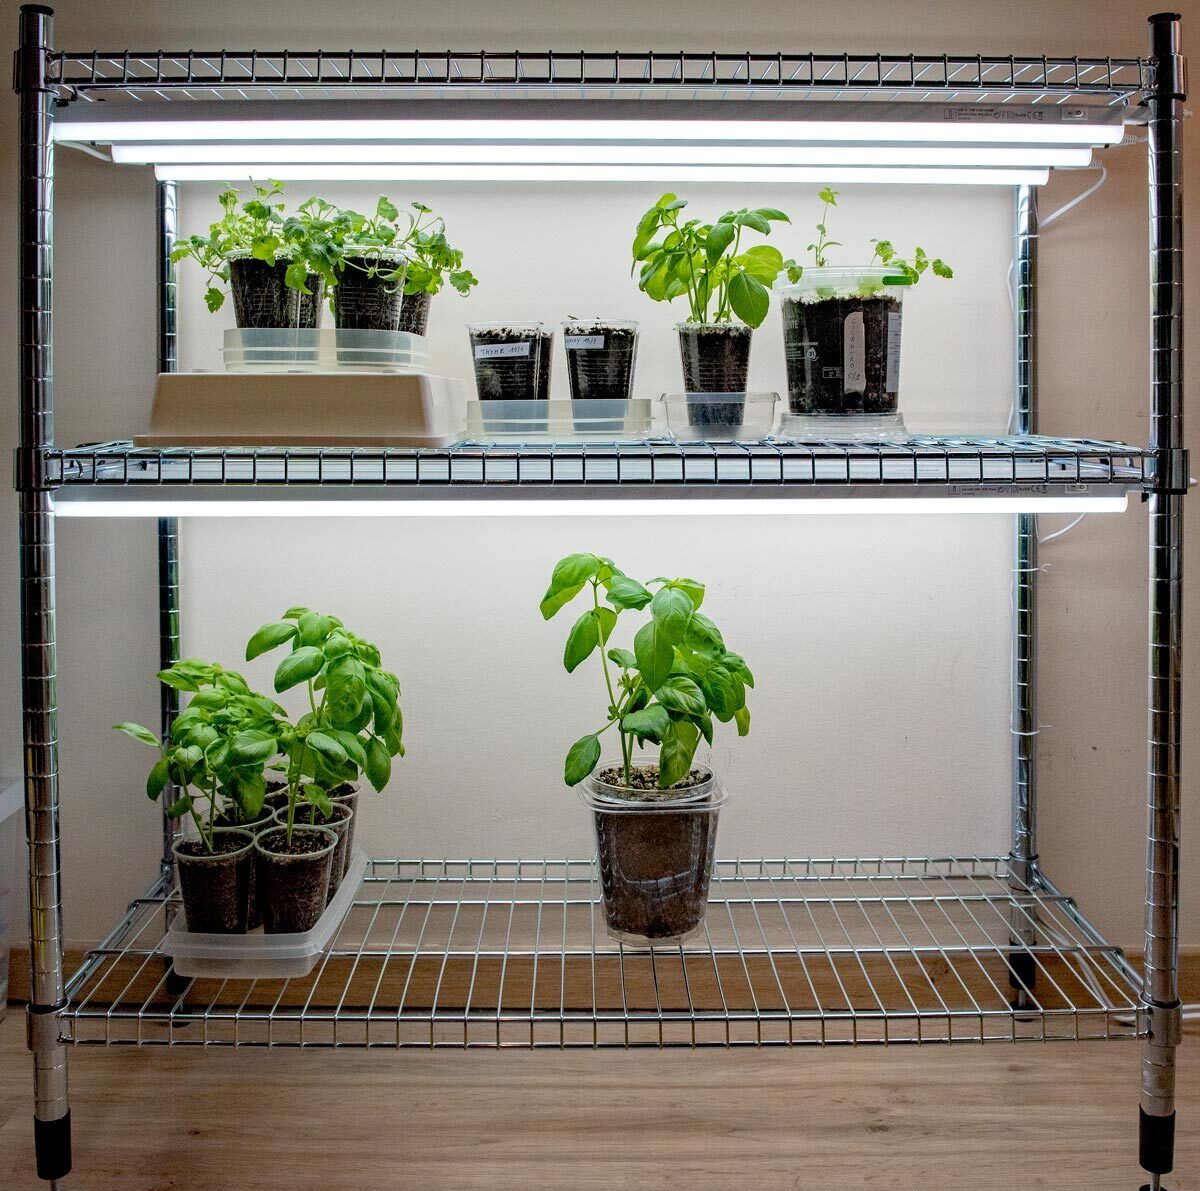
An example setup for indoor seed starting.
Seed trays
These let you start many plants with a small footprint while keeping roots separated for easy transplanting. They’re inexpensive and perfect for greens, herbs, and early vegetable starts.
1 × 50-cell insert (tomatoes)
1 × 72-cell insert (greens & herbs)
10–12 × 3–4″ pots
Reusable 1020 trays + domes
1020 trays allow bottom watering, which encourages deeper root growth and reduces disease. The 1020 means 10” by 20” and they are a standard size. Your garden center should have better and sturdier brands than a big box store. Humidity domes create a stable microclimate that dramatically improves germination rates in dry indoor air. Protect your babies!
2 x 10²⁰ trays
2 x humidity domes
Soil mix (bulk)
Seed-starting mix is lightweight and well-draining, which prevents compaction and root rot in young seedlings. Buying in bulk lowers cost and keeps your seedling growth consistent. Using the wrong soil here is the number one pitfall for new gardeners.
1 x 8-10 qt bag (seed starting mix)
Shelving
Shelving maximizes vertical space so multiple trays can be grown under proper lighting without crowding. It also creates a stable, organized setup that keeps plants at consistent height relative to lights.
A single 3 foot long shelf with at least two shelves. (You can buy these)
Grow lights
Grow lights provide the intensity and duration of light seedlings needed to grow strong and compact indoors. Without adequate light, seedlings become weak and leggy regardless of soil or watering. This is called being etiolated, when the seedling is reaching for the light. There’s your hort word of the day!
Two units of 3 foot lights (You can buy these)
Timer
A timer ensures consistent light exposure each day, which seedlings rely on for healthy growth. Automation removes human error and keeps plants on a stable day-night cycle. I have a couple of these timers at home. One for my fish tank and another for the Christmas lights. They are nice and reliable.
1 x timer (I use this one from Amazon)
Heat mats (if your area is cold)
Heat mats warm the soil to optimal germination temperatures, especially for warm-season crops like tomatoes and peppers. In cooler homes, they significantly speed up and even out sprouting.
1 x heat mat (just for the tomatoes)
Using this setup:
Keep the humidity dome on only until most seeds have sprouted; usually you crack it for a day first, then remove it completely, since domes left on too long encourage disease and weak growth. Run the lights 14–16 hours a day and keep them 2–3 inches above the seedlings once they’re up, as this is the difference between sturdy plants and weak, leggy ones. Bottom-water by pouring water into the solid 1020 tray and letting the cells soak for 10–20 minutes, then dump any excess, and water again only when the tray feels lighter and the surface looks dry. If you’re growing tomatoes in 50-cell trays, plan to pot them up into larger containers after 2–4 weeks, once they have several true leaves, which gives roots room to expand and keeps growth strong until outdoor transplanting. Use heat mats only for germination and turn them off once seedlings emerge, thin to one plant per cell, and add gentle airflow to build sturdy stems.
Written for 503 seed starters. 💌
This newsletter needs your help to grow. Refer two friends with the link below for a free sticker!
Until next Thursday,
Ken Welch
Ken Welch is a garden writer with a very serious degree in Horticulture. When his city lacked a community garden, he helped build one. He teaches new gardeners how to grow their own food.

Cibus Est Imperium | Food is Power